Create Sales-Ready WordPress eCommerce Website for Your Business. No Experience Required
Create a Business WordPress Website
Create a stunning WordPress eCommerce website with
Elementor_eCommerce. Drag,
drop, and design effortlessly. Boost sales with sleek layouts and
seamless shopping! Elementor is widely regarded as one of
the best tools for creating a eCommerce WordPress Website for your Business,
because it combines power, flexibility, and ease of use. Elementor has
Drag-and-Drop interface allows anyone, from entrepreneurs to marketers,
to build professional websites without writing any code. You can
customize every aspect of your site, from headers and footers to dynamic
content sections, ensuring your brand identity shines through. Elementor
also offers a vast library of templates and widgets, making it easy to
design pages that convert visitors into customers. With responsive
editing visible in real-time, SEO-friendly structure, and seamless
integration with WordPress plugins, Elementor empowers businesses to
launch fast, look polished, and grow confidently.
Watch the Elementor video tutorial given below to understand and create a beautiful WordPress Ecommerce Website using just a few mouse clicks.
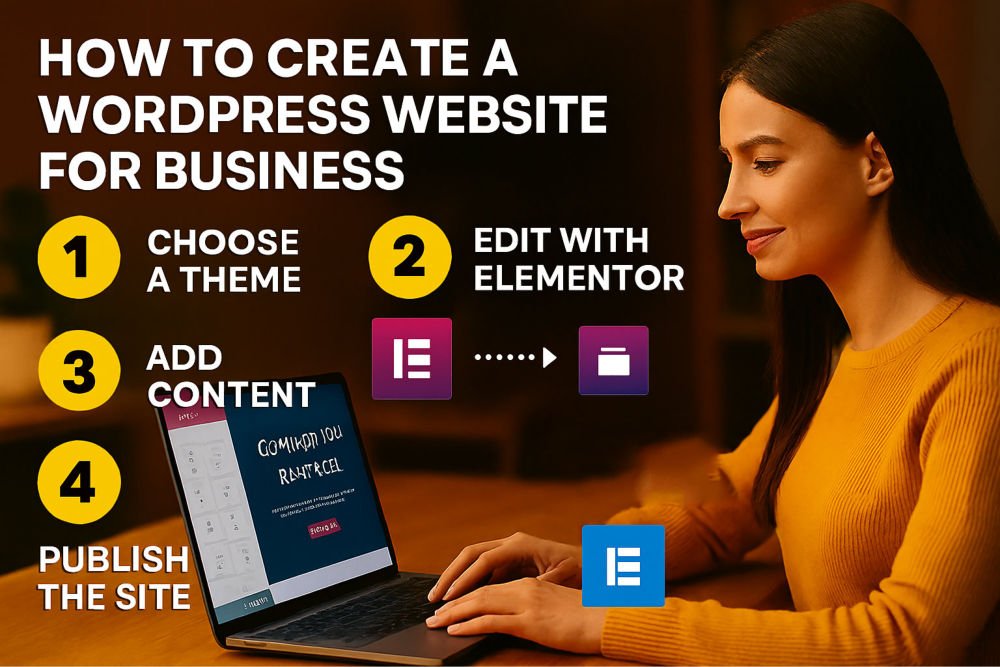
How to Create e-Commerce WordPress Website: A Step by Step Guide
Given below is a step by step Guide to create a successful WordPress e-Commerce website without writing a single line of code using Elementor. It is so simple that even a child with no website making experience could do it.
1. Install WordPress (Skip This Step for Elementor)
The first step in building your business website with Elementor is
installing WordPress. WordPress is a free, open-source content
management system (CMS) that powers millions of websites worldwide. Most
web hosting companies like for example
Contabo_Web_Hosting offer one-click WordPress
installation, which saves time and avoids technical complexity. Once
WordPress is installed, you will be able to log in to the WordPress dashboard using
your chosen username and password. The dashboard is your control center,
where you will manage themes, plugins, pages, and settings. At this stage,
it is important to configure basic site details such as your site title,
tagline, and permalink structure. Doing this early ensures your website
is optimized for search engines and easy to navigate. With WordPress
installed, you now have a solid foundation to build a professional
business website without writing a single line of code. But if you are
using Elementor then you can skip this step because
Elementor_eCommerce is already built on WordPress platform.
That means you do not have to install WordPress separately on Elementor.
2. Install the Hello Biz Theme (Skip This Step for Elementor)
After setting up WordPress, the next step is to install a theme that
provides the design framework for your site. For business websites, the
Hello Biz theme is an excellent choice because it is
lightweight, fast, and designed to work seamlessly with Elementor. To
install it, go to Appearance > Themes > Add New in your
WordPress dashboard. Search for 'Hello Biz", click Install,
and then Activate. Once activated, the theme provides a
clean, professional layout tailored for small businesses. It also
includes a setup wizard that guides you through importing demo content,
configuring menus, and customizing site settings. This starter content
gives you a ready-made structure that you can edit with your own
branding and information. Choosing Hello Biz ensures your site loads
quickly, looks modern, and is optimized for mobile devices. With the
theme in place, you are ready to start customizing your website to
reflect your brand identity. As mentioned earlier, if you are using
Elementor_eCommerce, you can skip this step no 2
also, because Elementor has WordPress themes Pre installed.
3. Prepare Your Assets (Skip This Step for Elementor)
Before diving into design, it is important to prepare your business assets. These include your logo, brand colors, fonts, and high-quality images that represent your products or services. Having these ready ensures consistency across your website and strengthens your brand identity. For example, if your business uses a specific color palette, you will want to apply those colors to buttons, headings, and backgrounds. Similarly, using consistent fonts across all pages creates a professional look. Drafting content for key pages, such as your homepage, services, about, and contact, will also save time during editing. Write clear, engaging copy that highlights your value proposition and speaks directly to your target audience. Collect testimonials, certifications, or awards that add credibility. By preparing assets in advance, you streamline the design process and avoid interruptions later. This step ensures your website feels cohesive, polished, and aligned with your business goals from the very beginning. In case of Elementor_eCommerce, there are millions of assets pre populated specifically for you, to choose from.
4. Customize Site Settings in Elementor WordPress
Once your theme is installed and assets are ready, it is time to
customize your site settings. Elementor allows you to define global
styles that apply across your entire website, ensuring consistency. In
the Site Settings panel in Elementor WordPress, you can adjust colors,
typography, and layout options. Start by setting your brand's primary
and secondary colors, which will automatically apply to buttons, links,
and headings. Next, choose fonts for headings and body text that reflect
your brand personality, professional, playful, or modern. You can also
configure spacing, margins, and default styles for your chosen WordPress widgets. Customizing
these settings early saves time because you won't need to manually
adjust styles on every page. Additionally, update your website identity by
uploading your logo and favicon, which appear in the browser tab. These
small details enhance brand recognition. By tailoring site settings, you
create a unified design language that strengthens your business online
presence.
5. Build Your E-Commerce WordPress Website Pages
With your settings in place, you can begin building the core pages of
your website using
Elementor_eCommerce Drag-and-Drop editor. Start with the
Homepage, which should immediately capture attention
and communicate your business value. Replace demo text and images with
your own, and include a clear call-to-action (CTA) such as "Contact Us"
or "Get Started." Next, design your Services Page to
showcase offerings with icons, short descriptions, and pricing if
applicable. The About Page should tell your company's
story, highlight your mission, and introduce your team with photos.
Finally, create a Contact Page that includes a form,
business address, phone number, and map for easy communication.
Elementor makes this process simple by allowing you to drag widgets like
text blocks, images, and forms directly onto the page. Each page should
be visually appealing, easy to navigate, and optimized to convert
visitors into customers.
6. Save & Reuse Sections in Elementor WordPress
One of Elementor’s most powerful features is the ability to save
sections and reuse them across your site. For example, if you design a
testimonial block or a call‑to‑action banner, you can save it as a
template and insert it on multiple pages. This not only saves time but
also ensures consistency in design and messaging. To do this, simply
right‑click on the section and choose Save as Template
in Elementor WordPress.
Later, you can access it from the template library and add it wherever
needed. Reusing sections is especially useful for elements like contact
forms, promotional banners, or service highlights. It also makes future
updates easier, if you edit the saved template, changes can be applied
across all instances. This feature helps maintain a professional look
and keeps your website cohesive. By leveraging reusable sections, you
streamline workflow and create a polished, unified business website.
7. Create a Thank You Page
A “Thank You” page is an often‑overlooked but essential part of a business website. After a visitor submits a contact form or signs up for a service, redirect them to a dedicated page that confirms their action. The Thank You page reassures users that their submission was successful and provides next steps, such as when they can expect a response. You can also use the Thank You page to build trust and engagement by including a friendly message, links to helpful resources, or even a special offer. Creating this page in Elementor_eCommerce is simple, design it like any other page, with clear text and visuals that align with your brand. Then, configure your form settings to redirect users to the Thank You page after submission. This small detail enhances user experience, reduces confusion, and demonstrates professionalism. It’s a subtle but powerful way to strengthen customer relationships.
8. Customize Header & Footer in Elementor WordPress
Your website’s header and footer are critical for navigation and
branding. The header typically includes your logo, main menu, and
sometimes contact details or social media links. It should be clean,
easy to read, and accessible from every page. Elementor WordPress allows you to
design custom headers with sticky options, so the menu remains visible
as users scroll. The footer, on the other hand, is a great place to
include quick links, contact information, and legal notices such as
privacy policies. You can also add social media icons, newsletter
sign‑up forms, or a secondary menu. Customizing these areas ensures
visitors can easily find important information without scrolling back to
the top. Consistent headers and footers also reinforce brand identity
across your site. By carefully designing these elements in your
Elementor WordPress eCommerce website, you improve
usability and create a professional, trustworthy impression for your
business website.
9. Preview Your Website in Elementor WordPress
Before publishing your site, it’s essential to preview and clean up
all content.
Elementor_eCommerce provides a preview mode that lets you see how
your pages will look to visitors. Carefully review each page for
spelling errors, broken links, and layout inconsistencies. Replace any
leftover demo content with your own text and images. Check that buttons
link to the correct destinations and that forms are functioning
properly. It’s also wise to test your site on different browsers to
ensure compatibility. Cleaning up unused widgets, and sections. Plugins
improve performance and reduces clutter. This step is about polishing
your eCommerce website, so that it feels professional and reliable. A clean, error‑free
eCommerce website builds trust with visitors and increases the likelihood of
conversions. Taking the time to preview and refine ensures your business
website is ready to make a strong impression when it goes live.
10. Responsive eCommerce WordPress Website
In today’s mobile‑first world, ensuring your website looks great on all devices is non‑negotiable. Elementor's responsive mode allows you to preview and adjust your design for desktop, tablet, and mobile views. Start by checking the homepage, make sure text is readable, images scale correctly, and buttons are easy to tap. Adjust font sizes, margins, and padding to fit smaller screens. For example, a three‑column layout on desktop may need to collapse into a single column on mobile for better readability. Test navigation menus to ensure they function smoothly on touch devices. Responsive design not only improves user experience but also boosts search engine rankings, as Google prioritizes mobile‑friendly sites. By thoroughly checking responsiveness, you guarantee that visitors can engage with your business website seamlessly, regardless of the device they use. This step is crucial for maximizing reach and customer satisfaction.
11. Elementor Pro Benefits (Optional)
Elementor_eCommerce is powerful, with advanced features that can elevate your business eCommerce website. It includes premium widgets such as sliders, popups, and pricing tables, which allow for more dynamic and engaging designs. It also offers a professional form builder with integrations for email marketing tools like AWeber, making it easier to capture leads. Another advantage of Elementor is the access it gives you to a larger library of templates, giving you more design options tailored to different industries. Elementor also enables theme building, allowing you to customize headers, footers, and archive pages with greater flexibility. Elementor is ideal for businesses looking to scale, and these features provide the tools to create a more sophisticated ecommerce website/