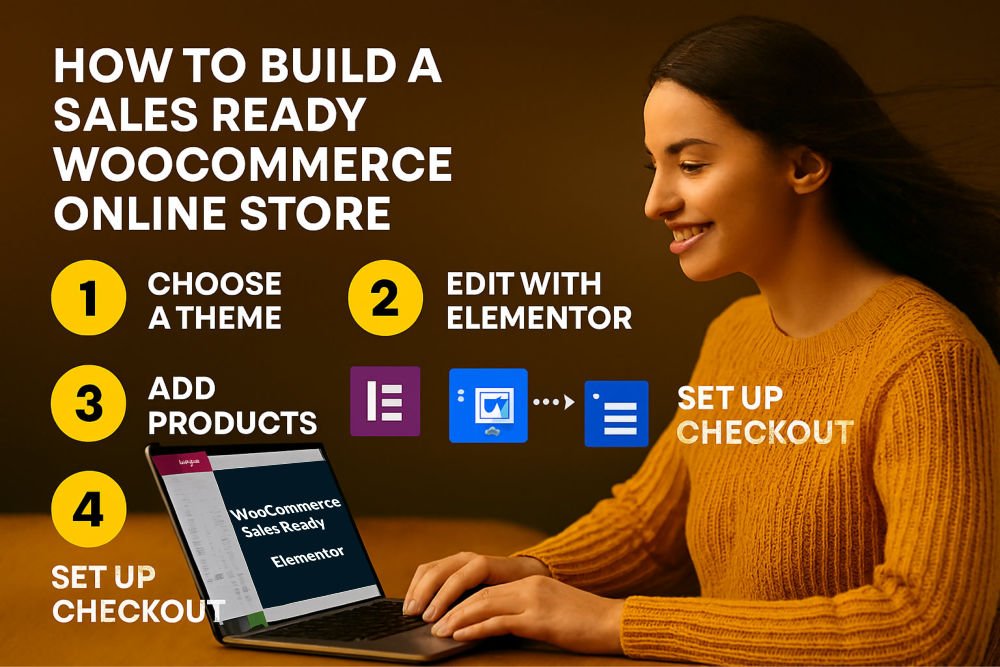
Create Sales Ready WooCommerce Website for Your Business with Elementor
Creating a sales-ready WooCommerce website with
Elementor_E-Commerce is fast and easy. Start by installing
Elementor and WooCommerce plugins on your WordPress site. (Elementor is
already built on the robust WordPress platform.) Choose a compatible
theme, preferably one optimized for eCommerce website. Use Elementor’s
drag-and-drop builder to design your homepage, product pages, and
checkout flow. Add WooCommerce widgets like product grids, add-to-cart
buttons, and pricing tables directly into your layout. Customize
headers, footers, and mobile responsiveness using Elementor’s Theme
Builder. Enhance conversions with call-to-action sections, testimonials,
and trust badges. Integrate payment gateways and configure shipping
options via WooCommerce settings. Finally, preview your website live in
real-time across devices and publish. With Elementor’s templates and
WooCommerce’s flexibility, you can launch a visually stunning,
conversion-focused store in minutes.
Watch the Elementor video tutorial given below to
understand how to Build a Sales-Ready WooCommerce Store with Elementor
in just a few minutes.
How to Create e-Commerce WordPress Website: A Step by Step Guide
Given below is a step by step Guide to create a stunningly beautiful Sales Ready WordPress
WooCommerce website with Elementor, without writing a single line of
code. It is so easy to make a eCommerce website using
Elemento_eCommerce, that even a child with no website making experience could
accomplish this task.
What is WooCommerce and What Does a Sales-Ready Website Mean?
WooCommerce is a free, open-source plugin for WordPress that
transforms a simple website into a fully functional eCommerce website or
an online store. It
allows you to sell physical products, digital downloads, or even
services, with built-in features like product listings, shopping carts,
payment gateways, and shipping options. And a “sales-ready” website means
more than just having products online. It is about creating an store
online that
is optimized to attract customers, encourage purchases, and make the
buying process smooth. This includes having a professional design, clear
product descriptions, easy navigation, secure checkout, and mobile
responsiveness. In short, WooCommerce provides the tools, and a
sales-ready website ensures those tools are used effectively to convert
visitors into paying customers. Elementor, a drag-and-drop page builder,
makes this process faster and more beginner-friendly, allowing you to
design a polished eCommerce website or an online store in minutes without needing coding skills.
Step 1: Setting Up WordPress and Installing WooCommerce
To begin, you need a WordPress website, which acts as the foundation
for your online store. WordPress is free, widely used, and flexible,
making it the perfect platform for beginners and professionals alike.
Once WordPress is installed on your hosting account, the next step is to
add WooCommerce. The WooCommerce plugin can be installed directly from the WordPress dashboard by navigating to “Plugins”
>> “Add New” >> searching
for “WooCommerce” >> and Clicking “Install Now.” After activation, WooCommerce will guide you through a setup wizard where you define your
eCommerce online store basics, such as currency, location, and product
type. The WooCommerce
wizard also helps you configure payment gateways like PayPal or Stripe,
and shipping options. By the end of this step, your WordPress site is
transformed into a basic online store. It’s functional, but not yet
visually appealing or optimized for sales. That’s where
Elemento_eCommerce comes
in.
Step 2: Installing Elementor for Easy Design
Elementor is a powerful drag-and-drop page builder plugin for
WordPress. It allows you to design your store visually, without writing
a single line of code. To install Elementor, go to “Plugins” >> “Add New”
>> search for “Elementor” >> and click “Install Now.” Once activated,
you’ll see a new option to edit pages with Elementor. The beauty of
Elementor lies in its simplicity: you can drag widgets like text boxes,
images, buttons, and WooCommerce-specific elements directly onto your
page. For example, you can add product grids, featured products, or “Add
to Cart” buttons with just a few clicks. Elementor also offers
pre-designed templates that you can customize to fit your brand. This
means you don’t have to start from scratch. Instead, you can choose a professional
layout and modify it to your needs. With Elementor installed, you’re
ready to design a store that looks polished and encourages customers to
buy.
Step 3: Choosing a Theme Compatible with WooCommerce and Elementor
A theme determines the overall look and feel of your website. While
WooCommerce works with most WordPress themes, choosing one that is
specifically optimized for WooCommerce and Elementor ensures smoother
performance and better design flexibility. Popular choices include
Astra, OceanWP, and Hello Elementor. These themes are lightweight,
customizable, and integrate seamlessly with Elementor’s drag-and-drop
Website_Builder. Once installed, you can adjust colors, fonts, and layouts to
match your brand identity. For example, if you’re selling fashion
products, you might choose a sleek, modern theme with bold visuals. If
you’re offering handmade crafts, a softer, minimalist theme might work
better. The right theme selected in WooCommerce will set the tone for your
eCommerce Website and makes it easier
to create a professional, sales-ready design. Remember, customers judge
your store within seconds, so a clean, attractive theme is essential for
building trust and encouraging purchases.
Step 4: Designing Your Homepage Using WooCommerce and Elementor
Your homepage is the first impression customers get, so it must be
engaging and sales-focused. Using Elementor, you can design a homepage
that highlights your products and guides visitors toward making a
purchase. Start with a hero section, a large banner with a headline,
image, and call-to-action button like “Shop Now.” Below that, add
featured product sections, categories, or promotions.
Elemento_WooCommerce
widgets make this easy: you can drag in product grids, sale banners, or
best-seller lists. Include trust-building elements like testimonials,
security badges, or guarantees. Don’t forget to design for mobile users, Elementor allows you to preview and adjust layouts for
different devices. A well-designed homepage should be visually
appealing, easy to navigate, and focused on driving sales. Think of it
as your digital storefront window: it should grab attention and invite
customers to explore further.
Step 5: Creating Product Pages with WooCommerce That Convert
Product pages are where customers decide whether to buy, so they must
be clear, persuasive, and visually appealing. With Elementor, you can
customize WooCommerce product pages to showcase your items effectively.
Start with high-quality product images. Customers want to see details
before purchasing. Add descriptive titles and concise, benefit-driven
descriptions. Include pricing, stock availability, and clear “Add to
Cart” buttons.
WooCommerce
Widget in Elementor allows you to add extra sections like product
videos, customer reviews, or FAQs to build trust. You can also highlight
related products to encourage upselling. For example, if you’re selling
a laptop, you might suggest accessories like a mouse or laptop bag. A
sales-ready product page should answer customer questions, reduce
hesitation, and make the buying process seamless. By customizing product
pages with Elementor, you ensure that every item in your store is
presented in the best possible light.
Step 6: Optimizing the Checkout Process
The checkout process is important, if it’s confusing or lengthy,
customers may abandon their carts. WooCommerce provides a default
checkout system, but with
Elemento_WooCommerce, you can customize it for simplicity
and clarity. Use Elementor’s WooCommerce widgets to design a streamlined
checkout page with minimal distractions. Keep form fields short, by only asking
for essential information like name, address, and payment details. Add
trust signals such as secure payment icons, money-back guarantees, or
customer support contact options. You can also include upsell
opportunities, like offering a discount on related products during
checkout. Mobile optimization is crucial here, as many customers shop on
their phones. A smooth, fast, and secure checkout experience increases
conversions and reduces cart abandonment. Think of it as the final step
in your sales funnel. Make it as easy as possible for customers to
complete their purchase.
Step 7: Adding Essential WooCommerce Sales-Boosting Features
Beyond design, certain features make your WooCommerce store truly
sales-ready. Elementor allows you to integrate these features
seamlessly. Add promotional banners for discounts or seasonal sales.
Include pop-ups for newsletter sign-ups or special offers. Use countdown
timers to create urgency for limited-time deals. Add testimonials and
reviews to build credibility. You can also integrate social proof, such
as “X people are viewing this product” or “Recently purchased”
notifications. Elementor has flexibility which means you can place these
elements strategically without cluttering your design. Additionally,
consider adding a blog section to share tips, product updates, or
industry news. This helps with SEO and builds trust. By combining
WooCommerce’s functionality with Elementor’s design tools, you can
create a store that not only looks great but also actively encourages
customers to buy.
Step 8: Testing and Launching Your WooCommerce Sales-Ready Website
Before launching your WooCommerce store built with Elemento_WooCommerce, thorough testing ensures everything works smoothly and delivers a professional customer experience. Start by checking your eCommerce online store homepage, product pages, and checkout flow across different devices like desktop, tablet, and mobile, to confirm responsiveness. Test product listings, add-to-cart buttons, and payment gateways to ensure transactions process correctly. Review shipping options and tax settings to avoid surprises for customers. It’s also wise to test coupon codes, pop-ups, and promotional banners to confirm they display as intended. Ask a friend or colleague to simulate a purchase and provide feedback on usability. Once satisfied, optimize speed using caching plugins and image compression, then enable SSL for secure transactions. Finally, announce your launch with email campaigns or social media promotions. A well-tested, polished eCommerce online store not only prevents technical issues but also builds trust, ensuring customers enjoy a seamless shopping experience from day one. The advantage of creating an online ecommerce website or online store with WooCommerce in Elementor is that it integrates effortlessly with email marketing tools like AWeber making it easier to capture leads. And Elementor gives you access to a large library of templates providing you with much more online ecommerce website design options which are tailored to different industries.